Summary
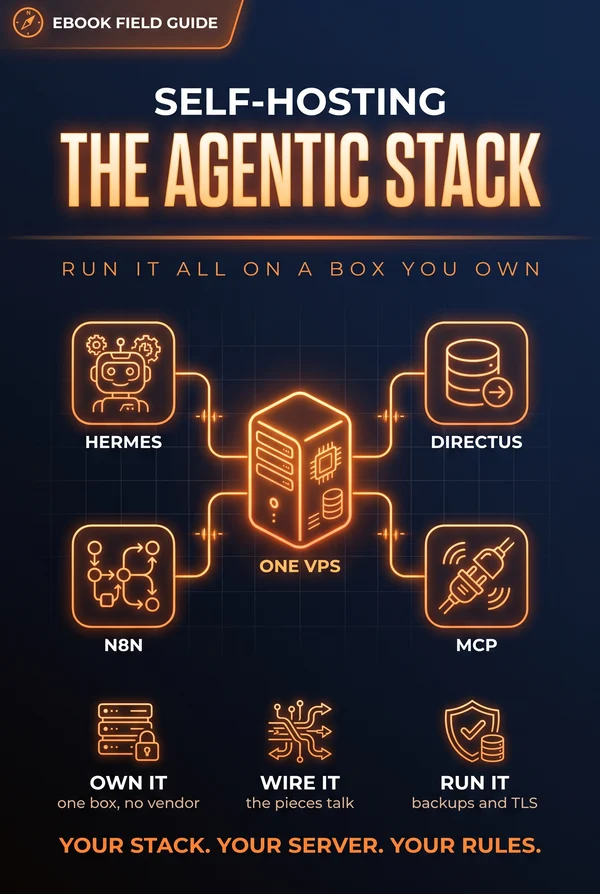
You can build all of this on someone else's servers. Rent an agent platform, a managed database, a hosted automation tool, pay per task, and watch your data flow through systems you don't control. Or you can run the whole thing on one box you own. This guide is about the second option: standing up a complete agentic stack on a single VPS, where Hermes runs your agents, Directus is your data and content layer, n8n handles the automation and glue, and MCP connects it all to the outside world. One server, no per-task billing, no vendor sitting between you and your own data.
This is the flagship that ties the series together. The other guides built the pieces; this one wires them into a system you operate. And we do it the easy way, with Coolify, an open-source self-hosted platform that manages Docker for you, handles TLS and backups, and ships one-click templates for n8n, Directus, and Hermes, so you spend your time on the parts that matter instead of hand-writing infrastructure. We start with why self-hosting is worth it (and honestly when it isn't), get Coolify onto a box, then deploy each layer in turn: the data and content layer, the automation engine, the agent runtime, and the MCP servers that give your agents real tools. Then we wire them into one system and cover the production realities Coolify mostly hands you, TLS, backups, secrets, and the host security and upkeep that stay your job.
It builds directly on The Boring Stack, Mastering Directus, and Mastering n8n, plus the agent guides in this series. By the end you'll have the whole stack running on hardware you control, doing real work, on your terms.
This is a living document and will be updated as the tools and patterns evolve.
Why Own the Box
There are two ways to run an agentic system. You can rent it, stitching together a managed agent platform, a hosted database, a SaaS automation tool, and paying each of them per seat or per task while your data passes through all of them. Or you can run the whole thing yourself, on one server you control. This guide is about the second path, and it opens with the honest case for and against it, because self-hosting is a genuinely good choice for a lot of people and a genuinely bad one for some.
What you get by owning it
Three things, mainly.
Control. It's your box. You decide the versions, the config, the data model, the upgrade schedule. Nobody deprecates a feature you depend on or changes pricing out from under you. When something breaks, you can actually go look, because every layer is yours to inspect.
Cost that doesn't scale with usage. Managed agent and automation platforms tend to bill per task, per run, per execution. That's fine until you're running a lot of them, at which point a flat monthly cost for a VPS you own starts looking very good. Heavy, steady workloads are exactly where self-hosting wins on money.
Data ownership. Your content, your conversations, your agents' memory, all of it lives on hardware you control rather than flowing through a stack of third parties. For anything sensitive, or anything you just don't want to hand over, that's the whole ballgame.
When not to do this
Self-hosting isn't free, it just moves the cost from a bill to your time. You become the ops team. You handle the updates, the backups, the security patches, the 2am "why is the box down." If you don't want that job, or your workload is tiny and bursty enough that per-task pricing is cheap, or you need to scale to massive traffic with high availability, a managed service is the smarter call. There's no shame in renting; it's the right answer plenty of the time.
The sweet spot for this guide is the middle: a developer or a small team with real, ongoing agentic work, who values control and predictable cost, and is willing to own a server to get them. If that's you, the rest of this guide stands up the whole stack. We start with the shape of what we're building.
The Architecture
Before we touch a server, let's get the shape clear. The stack is four services, each doing one job, all running on a single box and talking to each other over a private network. Four pieces, one machine.
The four pieces
Directus, the data and content layer. Point it at a Postgres database and you get an instant REST and GraphQL API over your data, plus a clean admin app for managing content. This is where your structured data lives: the things your agents read and write, the content you publish, the records that matter. (Roger's Mastering Directus goes deep on this piece on its own.)
n8n, the automation and glue layer. A visual workflow tool that wires events to actions: a webhook fires, a schedule ticks, something changes, and n8n runs a chain of steps in response. It's the connective tissue that lets the other services trigger each other without you hand-coding every integration. (Mastering n8n covers it thoroughly.)
Hermes, the agent layer. This is where your agents actually run: their profiles, their memory, their skills, the orchestration that lets them plan and execute. It's the runtime for everything the rest of this series has been about, the identity and memory and skills, now running on your own hardware instead of a hosted platform.
MCP, the tool layer. Your MCP servers are how the agents reach the rest of the world. An MCP server that exposes your Directus data, one that triggers n8n workflows, one that hits an external API. This is the bridge from "the agent can think" to "the agent can act on your systems." (See MCP from Scratch for building these.)
How they fit together
The picture in words: Hermes runs the agents. The agents act through MCP servers, which read and write Directus data and fire n8n workflows. n8n, in turn, can trigger agents when something happens in the outside world. Directus sits underneath as the source of truth they all share. Everything runs in containers on one VPS, on a private network, with only the bits that need to face the internet exposed.
Why this particular stack
These four were chosen because they cover the whole surface of an agentic system, they all self-host cleanly, and they compose. Data, automation, agents, tools: that's the full set of things you need, and each piece here is open, ownable, and good at its one job. You could swap a component for an equivalent, but this combination works, and it's the one we'll build. Next, the foundation it all sits on.
The Easy Path: Coolify
We just said the next step is laying the foundation, and you absolutely can do it by hand: install Docker, write a docker-compose.yml, stand up a reverse proxy for TLS, script your backups, manage a .env full of secrets. It works, and understanding it is worth something. But there's a much easier way to run all of this, and it's the one I'd actually recommend: a self-hosted platform called Coolify.
What Coolify is
Coolify is an open-source, self-hosted PaaS. Think of it as your own private Heroku or Netlify that runs on your VPS. You install it once, and it gives you a web admin where you deploy and manage services with a few clicks instead of hand-editing config files. Under the hood it's still Docker, still the same containers we've been talking about, but Coolify drives all of it for you and gives you a dashboard to see and control it.
If you've read Roger's The Boring Stack guide, you already know Coolify; that whole guide is about shipping real apps on a single VPS with it. Here we point the same tool at the agentic stack specifically.
What it handles for you
The reason Coolify is the easy path is that it does, automatically, most of the work a manual setup would make you do by hand:
- Docker, managed. You don't write compose files or run containers by hand. You add a service in the admin and Coolify deploys it.
- TLS, automatic. Point a domain at a service and Coolify obtains and renews its HTTPS certificate. No reverse-proxy config, no cert babysitting.
- Backups, built in. It can schedule database backups, including to off-box storage, from the dashboard.
- Secrets and env, in the UI. Each service's environment variables live in the admin, not a hand-managed
.envon the box. - One-click templates. This is the kicker for us: Coolify ships ready-made templates for the exact services we need, including n8n, Directus, and Hermes. Deploying them is closer to clicking "add" than to writing infrastructure.
Why we still cover what's underneath
If Coolify does all that, why did the last chapter bother explaining the pieces, and why will the coming chapters still walk through what each service needs? Because Coolify deploys the stack, but it doesn't understand your stack for you. You still need to know what Directus is for, why Hermes wants a database and Redis, how the services should talk, and where the security risks live. Coolify is the easy how; the why and the shape are still yours, and that's most of what makes this guide worth reading. A template gets Directus running in a minute. Knowing what to do with it is the actual job.
The plan from here
So here's how the rest of the guide goes: we use Coolify as the deployment tool, click the templates where they exist, and spend our words on the understanding the templates can't give you. Where it helps, I'll note what Coolify is doing under the hood (the compose, the proxy, the volumes) so none of it is a black box. Let's get a box and put Coolify on it.
Pick a Box and Install Coolify
Coolify needs somewhere to live, and that's a VPS, same as the manual path. The difference is that once the box is up, installing Coolify is close to a single command, and from there you work in a dashboard instead of a terminal.
Sizing the box
You're going to run four services, a couple of databases, and Coolify itself on one machine, so don't go too small. A reasonable starting point is around 4 vCPUs, 8 GB of RAM, and 80+ GB of disk. Coolify is light, but Postgres and the agent workloads are hungry. You can start smaller and resize up later, since most providers let you scale a box with a reboot, so it's fine to begin modestly and grow into it. Pick a provider you trust and a region near your users. Coolify's own docs publish a current minimum spec worth a look, but the figures above leave comfortable headroom for the whole stack.
Harden the box first
Before installing anything, do the basic hygiene on the fresh server, because this is the one part Coolify won't do for you: create a non-root user with sudo, set up SSH key login, and disable password and root SSH. An agentic stack is a tempting target, and a box you can only reach with a key is far harder to break into. Plan to keep a firewall that's closed by default and open only to SSH and web traffic (ports 80 and 443, which Coolify uses for routing and for issuing certificates).
Install Coolify
With a clean, hardened box, installing Coolify is a single script from its official site. It sets up Docker for you (so you don't install it separately), stands up its own proxy for routing and TLS, and brings up the dashboard. When it finishes, you reach the Coolify admin in your browser, create your account, and you're looking at the control panel you'll run the whole stack from. That's the foundation: not a directory of compose files, but a running platform waiting for you to add services.
Follow Coolify's official install instructions for the exact command and current steps, since an installer is precisely the kind of thing that changes version to version. The Boring Stack guide walks through this install in more depth if you want the longer version.
Point a domain at it
One setup step that pays off immediately: point a domain, or a few subdomains, at your server's IP. Coolify uses domains to route to your services and to issue their TLS certificates, so having something like directus.yourdomain.com and n8n.yourdomain.com ready means the moment you deploy a service you can give it a real HTTPS URL. With the box hardened, Coolify installed, and DNS pointed, you're ready to deploy the stack, starting with the data layer.
The Data Layer: Directus and Postgres
First service up is the one everything else builds on: the data layer, which is Directus backed by Postgres. On the manual path this is a chunk of compose file. In Coolify, it's mostly picking a template and filling in a few values.
Deploy from the template
Coolify ships a Directus template (and templates for databases), so adding the data layer means creating a new resource from the dashboard, choosing Directus, and letting Coolify provision it along with its Postgres database. The template wires the two together, sets up the persistent storage, and gives Directus a URL on the domain you pointed at the box, with TLS already handled. What would have been a careful compose file plus a reverse-proxy entry is now a guided form.
You'll still set a handful of values: the admin email and password, and the security key and secret Directus needs. Coolify keeps those in its own environment store rather than a .env on disk.
What Coolify is doing under the hood
It's worth knowing what that template actually creates, so it isn't a black box. Behind the scenes it's the same thing the manual path would build: a Postgres container, a Directus container pointed at it by an internal hostname, persistent volumes for the database files and the uploads, and a proxy route terminating TLS in front. Coolify generates and runs all of that for you. If you ever need the details, they're right there in the dashboard; the template just spares you writing them.
# what the template is roughly standing up for you:
database: { image: postgres:16, volumes: [pgdata:/var/lib/postgresql/data] }
directus: { image: directus/directus, depends_on: [database],
            volumes: [uploads:/directus/uploads] }
The part Coolify can't do: your data model
Here's where the guide earns its keep, because deploying Directus is the easy minute and using it well is the real work. Directus gives you a REST and GraphQL API over whatever data model you define, an admin app, file storage, and granular permissions, but what you model and how you lock it down is yours. That's the whole subject of Mastering Directus, and it's the thing the template can't hand you. For this stack, the key point is that Directus is the shared source of truth, the thing your agents, your workflows, and your apps all read and write, so model it with that central role in mind.
Confirm it's live
Once Coolify reports the deploy healthy and you can log into the Directus admin at its HTTPS URL, the foundation is real and the rest of the stack has something to build on. Next, the layer that makes the system act on its own: automation.
The Automation Layer: n8n
With data in place, next is the automation layer, n8n, the glue that runs a workflow whenever something happens. Like Directus, n8n is a one-click template in Coolify, so getting it running is quick and the interesting part is what you do with it.
Deploy from the template
Coolify has an n8n template, so you add it the same way: new resource, pick n8n, deploy. The template provisions n8n with its database for storing workflows and execution history, sets the encryption key that protects stored credentials, gives it a URL with TLS, and brings up the editor. A setup that on the manual path means a compose service plus a database plus careful env handling is, here, a guided deploy.
One value worth treating with care is n8n's encryption key, which encrypts the credentials it stores. Coolify manages it for you, but make sure it's captured in your backups, because losing it means losing access to those stored credentials.
Queue mode when it matters
For light use, the default n8n deploy is fine. Once you're running automation that genuinely matters, n8n has a queue mode that uses Redis to spread workflow executions across workers, keeping it responsive under load instead of running everything in one process. If your stack already runs Redis (the agent layer often wants it), enabling queue mode is worth it, and Mastering n8n covers that and the rest of running n8n seriously.
What it does for the stack
n8n is what turns a set of services into a system that reacts. In this stack it'll end up:
- Reacting to Directus changes (a new record, a status flip) by kicking off downstream work.
- Running scheduled jobs: nightly syncs, periodic checks, recurring agent tasks.
- Sitting between your stack and the outside world, catching webhooks and calling external APIs.
- Triggering agents when something happens, and getting triggered by agents that need a workflow run. That two-way link with the agent layer is part of what we wire up shortly.
Bring it up
Once Coolify shows n8n healthy and you can open its editor at its HTTPS URL, you've got a visual canvas for connecting events to actions across the whole stack. Now the layer this is all really for: the agents.
The Agent Layer: Hermes
Now the centerpiece, the agent runtime: Hermes, the open, self-hosted agent platform from Nous Research, and the place everything the rest of this series covered actually runs. And conveniently, Coolify has a Hermes template, so deploying the agent layer is the same click-and-configure flow as the others.
Deploy from the template
Add Hermes as a new resource from the template, and Coolify provisions it along with the database and Redis it depends on, the same shared infrastructure the rest of your stack uses. It gets a URL with TLS and its persistent state in managed storage. The template handles the wiring; what you configure is the part specific to your setup, chiefly how Hermes reaches a model to think with.
What this layer holds
If you've read the trilogy in this series, this is where those pieces come home. Hermes is the runtime for an agent's identity, its memory, and its skills, and it's where the multi-agent ideas from Running the Fleet operate: profiles that make each agent a distinct citizen, a board that coordinates work, the orchestration that routes a goal to the right specialist. Deploying it through Coolify is easy; understanding what to put in it is the work the earlier guides did.
Model access and guardrails
Your agents need a model, whether a hosted API or one you run yourself, and the credentials for it are exactly the kind of secret the guardrails guide cares about: scope them tight, keep them in Coolify's environment store and out of any agent's reachable context, and treat them as revocable. The agent layer is also where guardrails matter most, since this is the part that takes actions. Running Hermes yourself, on your own box, is what gives you full control over the sandboxing, permissions, and human checkpoints, instead of inheriting whatever a platform decided for you.
Follow the project's specifics
One note: even with a template, the exact config Hermes wants (environment variables, model settings, version details) comes from the Hermes project's own docs, since those move faster than any guide can track. Coolify gets the container running with sensible defaults; the project docs are the source of truth for tuning it. With Hermes deployed, you have agents running on your own hardware. What they're missing is reach, and that's the last service.
The Tool Layer: MCP
An agent that can think but can't touch anything is just a chatbot. The tool layer is what gives your agents reach, and on this stack that's MCP servers: the standardized bridges that let agents read your data, fire your workflows, and call external services. These are usually things you build (or grab) rather than click a template for, but Coolify still deploys them the same easy way.
Deploy them as Coolify resources
Unlike Directus or n8n, your MCP servers are often custom: a small server you wrote to expose your data, or one pulled from a repo. Coolify handles these just as happily as the templated services, since it can deploy a resource from a Docker image, a Dockerfile, or a git repo. So an MCP server you built (following MCP from Scratch) deploys as its own resource in the same dashboard, gets managed alongside everything else, and reaches the other services on the internal network.
The servers worth running
A few MCP servers cover most of what agents on this stack need:
- A Directus server, exposing your data so agents can read records, search content, and carefully write back, turning your source of truth into something agents act on.
- An n8n trigger server, letting agents fire workflows so they can hand off a multi-step automation instead of doing every step themselves.
- External-API servers, wrapping whatever outside services the work requires: search, messaging, and so on.
Secrets live at the tool boundary
Each MCP server holds the credentials for whatever it connects to: a Directus token, an API key. Those go in the server's environment in Coolify, which means the agent never holds them. It just calls the tool, and the server makes the authenticated request on its behalf. That's exactly the pattern the guardrails guide recommends, the credential lives at the tool boundary, not in the agent's reach, and Coolify's env store is a clean place to keep it.
Design and gate them
Two reminders carry real weight here. First, design these tools well, because as Tool Design for Agents covers, the agent is only as capable as the tool surface you give it. Second, the MCP servers are where outbound and destructive actions live, which makes them where your permission gates belong; a server that can delete records or post to the world is one whose risky tools should be gated, not wide open. With the MCP servers deployed, every layer is online: data, automation, agents, and tools. Next, making them work as one system.
Wiring It Together
All four layers are deployed, but deployed side by side isn't the same as working together. This chapter is the wiring: how the services find each other and the flows that turn separate deployments into one system. With Coolify, the connecting is mostly a matter of putting the services on the same internal network and referring to them by name.
Connect them on Coolify's network
Coolify runs your services as containers, and the way they talk to each other privately is by sharing an internal Docker network, which Coolify manages. Services on the same network reach each other by name without going out to the public internet: Directus talks to its Postgres internally, an MCP server talks to Directus internally, Hermes talks to its MCP servers internally. You expose to the web only the handful of services that need a public URL (the Directus admin, the n8n editor), and Coolify gives those their domain and TLS while the rest stay private. Keeping internal traffic internal is both simpler and safer, and Coolify's networking model makes it the default rather than something you wire by hand.
The flows that make it a system
With the services able to reach each other, a few interaction patterns bring the stack to life:
- Agent acts on data. Hermes runs an agent, the agent calls a Directus MCP tool, the tool reads or writes Directus on Postgres. The agent is operating on your real source of truth.
- Agent hands off to automation. An agent calls an n8n trigger tool to start a workflow, letting n8n run the rote chain while the agent moves on.
- Automation triggers an agent. The reverse: a webhook, a schedule, or a Directus change is caught by n8n, which triggers an agent to handle it. This is how agents respond to the world without a human starting every run.
- Everything shares the truth. Because Directus underpins it all, agents, workflows, and your own apps read and write the same data and stay consistent by default.
Design the loops on purpose
Those flows combine into loops: an event triggers an agent, which does work, writes to Directus, and fires a workflow that kicks off the next thing. That's powerful, and worth designing deliberately so you don't accidentally build an agent that triggers a workflow that triggers the same agent. Map the flows you actually want and watch for cycles, because a system you understand is one you can debug. At this point you have a working agentic system: agents acting on your data, automation linking events to actions, the source of truth underneath, and Coolify managing all of it. The remaining question is how much of "production-ready" you still owe, and how much Coolify already gave you.
Hardening: What Coolify Handles, What You Own
On the manual path, this is the heavy chapter: standing up TLS, scripting backups, wrangling secrets. The good news with Coolify is that it already did most of it. The job here shifts from building those things to confirming they're on, and owning the few that are still yours.
What Coolify already handles
Three of the four pillars of a trustworthy deployment come largely for free:
- TLS. Every service you gave a domain is already on HTTPS, with certificates Coolify obtained and will auto-renew. There's no reverse proxy for you to configure and no cert expiry to babysit; it's handled at the platform level.
- Backups. Coolify can schedule database backups from the dashboard, including shipping them to off-box storage like S3. You turn it on and point it somewhere; you don't write backup scripts.
- Secrets. Each service's environment variables live in Coolify's store rather than a hand-managed file on disk, which keeps them out of your repo and in one managed place.
That's a real chunk of the manual hardening checklist, done by the platform.
What's still on you
Coolify gives you the mechanisms, but a few things still need your judgment and attention:
- Turn backups on, and test a restore. Coolify can back up, but it won't decide your schedule or prove the backups work. Configure backups for every database and your important volumes, send them off-box, and then actually restore one onto a fresh setup to confirm it works. An untested backup is a guess, no matter what tool made it.
- The box's own security. Coolify secures the apps; the server underneath is still yours. Keep the firewall closed to all but SSH and web, keep SSH key-only, and keep the OS patched. The platform doesn't harden the host for you.
- Agent and credential discipline. Everything from the guardrails guide still applies and sits above Coolify: scope each secret to the minimum, keep credentials out of any agent's reachable context, and use ones you can rotate fast. Coolify gives you a clean place to store secrets; it doesn't decide how tightly they're scoped or who can reach them.
The trust checklist
Before you call this dependable: every public service on HTTPS (Coolify's default, worth a glance to confirm), backups scheduled and shipped off-box, a restore you've actually tested, the host firewalled and SSH key-only, the OS patched, and your agent guardrails in place. Coolify hands you most of that list pre-checked; your part is confirming it and owning the host and the agent layer. With that done, the last question is the ongoing one: keeping it healthy over time.
Operating It Over Time
Standing the stack up was a weekend, and with Coolify, closer to an afternoon. Keeping it healthy is the real commitment, and it's the part to be honest about before you lean on the thing. Coolify makes the ongoing work lighter than the manual path, but it doesn't make it zero.
Updates, the easy way
Everything in the stack still gets updates: the OS, Coolify itself, and each service. The difference is that Coolify turns most service updates into a dashboard action rather than a careful compose-and-restart dance, often a redeploy button or a version bump in the UI. That's genuinely easier, but the discipline is the same: do it deliberately, not blindly. Read release notes for breaking changes (database migrations especially), update one service at a time, and lean on your tested backups so a bad update is a rollback, not a disaster. And don't forget Coolify and the host OS themselves, which need their own patching even though they're not in the service list.
Monitoring
You still need to know when something's wrong before your users tell you. Coolify gives you a head start: the dashboard shows service status and logs in one place, so a lot of "is it up, and what did it say" is right there. Beyond that, watch the things that quietly kill a self-hosted box, chiefly disk, since databases, logs, and backups grow until the day they fill the volume and everything stops. A simple alert on low disk and memory is worth setting up, because the dashboard tells you the state when you look, and an alert tells you when you're not looking.
The honest cost
Even made easier, this is real, ongoing responsibility: a bit of attention most months, a stressful afternoon now and then. That's the trade for control and predictable cost, and for many people it's well worth it, especially with Coolify trimming the busywork. But re-check the trade as things change. If your workload explodes and you need real scale and high availability, or the upkeep starts eating time you'd rather build with, that's the signal to move a piece, or the whole thing, to a managed service. Self-hosting is a choice that fits some conditions, and conditions change.
What you've got
When it's running well, what you have is genuinely yours: a complete agentic system on hardware you control, with your data, your agents, your automation, and your tools, no per-task meter and no vendor between you and your own stack, all managed from one dashboard. Directus holds the truth, n8n connects the events, Hermes runs the agents, MCP gives them hands, and Coolify keeps the whole thing running on one box you own.
That's the series brought together. The other guides taught the pieces: how an agent thinks and remembers and acts, how to give it tools and keep it safe. This one put them on a server, with a platform that makes the hosting the easy part, and turned them into a system. From here, it's yours to run, and yours to grow.